Photography is an incredible art form that has the power to capture beautiful moments and memories that we can cherish forever. However, for beginners, it can be overwhelming to master the art of photography. That's why we've compiled the ultimate list of photography tips for beginners to get you started on your journey towards capturing great images.
Whether you're using a smartphone or a professional camera kit, these top tips you'll learn will help you master photography in no time. From understanding your camera's settings to composing your shots, this article will cover everything you need to know to take stunning photographs. Plus, we'll provide must-see video tutorials so you can see these tips in action!
So grab your camera and get ready to learn some essential photography skills. With our helpful guide, you'll be taking amazing photos in no time!
Here's an interesting read: Olympus Live Time
Master Photography with Must-See Video Tutorials
Photography is an art that requires a lot of skill and practice to master. With the right techniques, camera skills, and setups explained opens up new creative possibilities. Whether you're into taking perfect head-and-shoulders portrait opens or love capturing people opens in their natural element, video tutorials can help you achieve great shots.
Daylight opens is not always available, and sometimes off-camera flash photography opens the door to dramatic portraits or film noir photography opens up new realms of creativity. With unlimited access to videos on flashgun opens and how to achieve natural lighting, you can learn baby photography tips opens and great group photograph tips for your next family reunion or gathering.
Posing perfect people shots opens requires practice portrait lighting with fill lighting for the best results. With model opens showing how to use single light opens techniques for portrait photography opens up a whole new world of possibilities. By reading 5 articles on different topics each week, you can learn new skills and improve your craft at your own pace with unlimited access to video tutorials.
Consider reading: Wedding Photography Lighting Techniques
Using These Photography Tips for Beginners
Capturing stunning photos is something that can be achieved with the right knowledge and practice. As a beginner, it's essential to understand the basic principles of photography and how they apply to your camera settings. The first step is to invest in a good quality camera or use your smartphone camera, which has become increasingly advanced over time.
Once you have your camera, take the time to learn about its features and functions. This will help you understand how to adjust your settings according to your surroundings and lighting conditions. Remember that photography is all about capturing moments in time, so make sure you take advantage of the time you're given by taking multiple shots from different angles.
Lastly, don't forget to have fun! Experiment with different techniques such as framing, composition, and lighting. Beautiful photos don't always have to follow traditional rules; sometimes breaking them can create unexpected results. With these tips in mind, start exploring the world around you through your lens and let your creativity flow!
A fresh viewpoint: Home Photography Idea Powerful Photos
1. What are some photography tips for beginners that will instantly improve my photos?
If you're a beginner photographer looking to improve your photos, there are some key concepts about light you'll want to keep in mind. First and foremost, learn to recognize beautiful light. The golden hours of early morning and late afternoon are prime times for capturing stunning photos with warm, soft light. On cloudy days, look for similarly soft light to avoid shooting in harsh sunlight.
Another important aspect of photography guaranteed to improve your images is composition fundamentals. Find a powerful main subject and use the rule of thirds to place it effectively within the frame. Consider using leading lines or framing techniques to draw attention to your subject figure. By understanding these tips, you'll be well on your way to capturing stunning photos in no time!
Check this out: Low Light
2. What are the camera settings every beginner should know about?
One of the main settings that every beginner should know about is the aperture setting. Understanding aperture is crucial because it determines how much light enters the camera, and it affects the depth of field. A smaller aperture (higher f-number) lets less light in, while a wider aperture (lower f-number) lets more light in and creates a shallower depth of field. The type of lens you have also affects the available apertures that you can use.
Another important setting to master is shutter speed. Shutter speed controls how long the camera's sensor is exposed to light, which can freeze motion or create motion blur. Faster shutter speeds freeze motion, while slower shutter speeds create blur. However, using slower shutter speeds can compromise image quality by introducing camera shake. Finally, ISO also plays a role in determining exposure levels in dark situations by adjusting camera sensor sensitivity to light. However, using higher ISOs can produce noise that hurts image quality.
Discover more: Slow Shutter Speed
3. What photography concepts should every beginner know?
As a beginner photographer, it's crucial to understand some basic camera settings that could make or break your photos. Firstly, the aperture determines how much light enters the lens and affects the depth of field. A wider aperture (lower f-number) allows more light in and produces a shallower depth of field, while a smaller aperture (higher f-number) lets less light in and creates a deeper depth of field.
Secondly, shutter speed controls how long the camera's sensor is exposed to light. Faster shutter speeds freeze motion, while slower shutter speeds create blur effects. It's important to play around with these settings to get familiar with how they affect your images. By mastering these concepts, you'll be well on your way to taking stunning photos!
Curious to learn more? Check out: Fisheye Lens Camera Tips
4. 3 thoughts on “20 Tips for Photography Beginners”
One good point made in the article "20 Tips for Photography Beginners" is to avoid using digital zooming. This can cause you to lose sharpness in your photos and should be avoided completely. Instead, stick to maximum focal lengths on your DSLR kit lens or invest in a telephoto prime lens for bird photography or other distant subjects.
Another harsh statement that stands out is "Don't zoom." While it may seem counterintuitive, zooming with your 55-200mm kit lens don't unnecessarily shoot weddings or events can actually lead to lower quality images. Instead, focus on finding the right focal length for each shot and moving closer or further away from your subject as needed. Big Mike, who commented on the article on Darien July 19, 2022 at 11:58 PM, agrees that this is a great tip and recommends investing in a preferred camera for better results.
Take a look at this: Vlog Vlogging Kit Tips
Get the Best Shot: Photography Tips for Newbies
If you're new to photography, you may be wondering how to capture spectacular photos. One of the main things to keep in mind is light. Good light is an essential ingredient for good photography. Without good light, you're going to struggle to get a good photo, period.
So what do I mean by good light? Well, it's all about carefully choosing the right time of day and understanding how different types of light affect your photos. In the first of two key topics I've divided this article into, I'll explain everything you need to know about good light.
The second topic is composition. Composition refers to how you arrange the main subject and other elements in your photo to create a stunning image. With careful composition, even an ordinary scene can become extraordinary. In this section, I'll cover everything from framing and rule of thirds to leading lines and symmetry. And if you're wondering about colors, editing will be discussed in separate articles (words you're looking for are "color" and "editing").
Suggestion: Photo Ideas Levitation Photography Secrets
1. Shoot During the Golden Hours for the Best Light
If you're looking to capture beautiful photos, shooting during the golden hours is a must. The golden hours are the times just after sunrise and just before sunset when the sun casts an amazing light that gives your images evenly distributed highlights and shadows. This lovely glow adds depth and dimension to your entire scene, making for outstanding photos you've always wanted.
While capturing nice colors during the golden hour is a good thing, it can be pretty tough for beginners to get right. But with some practice, you'll soon learn how to take advantage of this stunning golden-hour lighting. To learn more about capturing great light in your photos, check out our related post on photography tips for beginners.
For another approach, see: Ring Light
2. Photograph During Cloudy Light for Beautiful Colors
One of my favorite types of lighting for photography is the golden-hour lighting, but when that's not an option, cloudy light can be just as beautiful. Cloudy light isn't usually the first choice for many photographers, but it can give off a subtler, softer effect that makes colors pop. Firstly, clouds diffuse the light so there are no harsh shadows or black tones in your images.
If you're shooting colorful subjects, paying attention to the type of lighting you use is crucial to capturing beautiful photos. On a day you'll end up with harsh midday lighting, waiting for some cloud cover could be a good idea. The soft light provided by cloudy weather makes colors look more vibrant and natural while reducing any unwanted shadows or reflections. So if you're looking for a new photography tip to try out when shooting colorful subjects, don't overlook the beauty of cloudy light!
For more insights, see: Create Fantastic Light Orb Images
3. Avoid Midday Light Whenever You Can
One of the most important photography tips for beginners is to avoid bright midday light whenever you can. The reason being that midday light beats down harshly, causing unpleasant shadows and making your images look flat and lifeless. Instead, aim to shoot during the golden hours of soft light, just after sunrise or before sunset, or on a cloudy day when the light is diffused.
If you're shooting in white photography, it's especially important to avoid midday light because white images tend to reflect light and cause even more contrast with sunny midday lighting. It's better to stay home during these hours than risk ruining your shots with harsh lighting. For more photography tips for beginners, check out our related posts section below!
4. Expose Carefully for the Most Possible Details
Exposure refers to the amount of light that enters your camera's sensor, and it is crucial in getting a good photograph. If you expose too much, you'll lose detail in light tones, and if you expose too little, you'll lose detail in dark tones. Getting an evenly exposed photo isn't always an easy task, especially if you're a beginner photographer. Luckily, modern cameras have good built-in meters that help make corrections for you.
However, camera meters aren't always accurate in all situations. In most cases, they tend to underexpose dark tones and overexpose light tones. This is where exposure compensation comes into play. If you're shooting a nightscape or a snowscape, for example, getting the correct exposure can be counterintuitive. But don't worry; there's no need for a technical explanation of the exposure triangle (shutter speed, aperture, and ISO). Just know that by using exposure compensation on your camera settings, you can adjust the exposure to get the correct amount of detail in both light and dark tones.
Explore further: Long Exposure Photography
5. Use Frontlight for Even Photos of Your Subject
Using frontlight is a great way to ensure even photos of your subject. When shooting frontlight, the light hits your subject straight on, which can help eliminate any harsh shadows or uneven lighting. This is especially important when shooting during the middle of the day, when the sun is directly overhead and can create an overly harsh shot.
To implement this tip, try shooting during the "golden hours" - just after sunrise or just before sunset - when the sun is lower in the sky and creates a softer, more diffused light. If you're unable to shoot during these times, make sure that your subject is facing towards the light source so that it's hitting them straight on. For more related tips on natural light photography, check out our post on "11 Easy Tips for Natural Light Photography."
6. Use Backlight for Dramatic Silhouettes
One of the easiest and most effective ways to create stunning photos is by using backlight. Unlike frontlight, backlight is when the light source is behind your subject. To find backlight, position yourself so that the sun or other light source is directly behind your main object.
By positioning your subject in front of the light source, you can create a striking silhouette. This technique works especially well if you have a large object or person in your photo. To make sure your silhouette is properly exposed, use exposure compensation to adjust for the bright background. With a bit of practice, you can create stunning photos with dramatic silhouettes using just backlight.
Additional reading: Lightroom Tutorial 20 Create
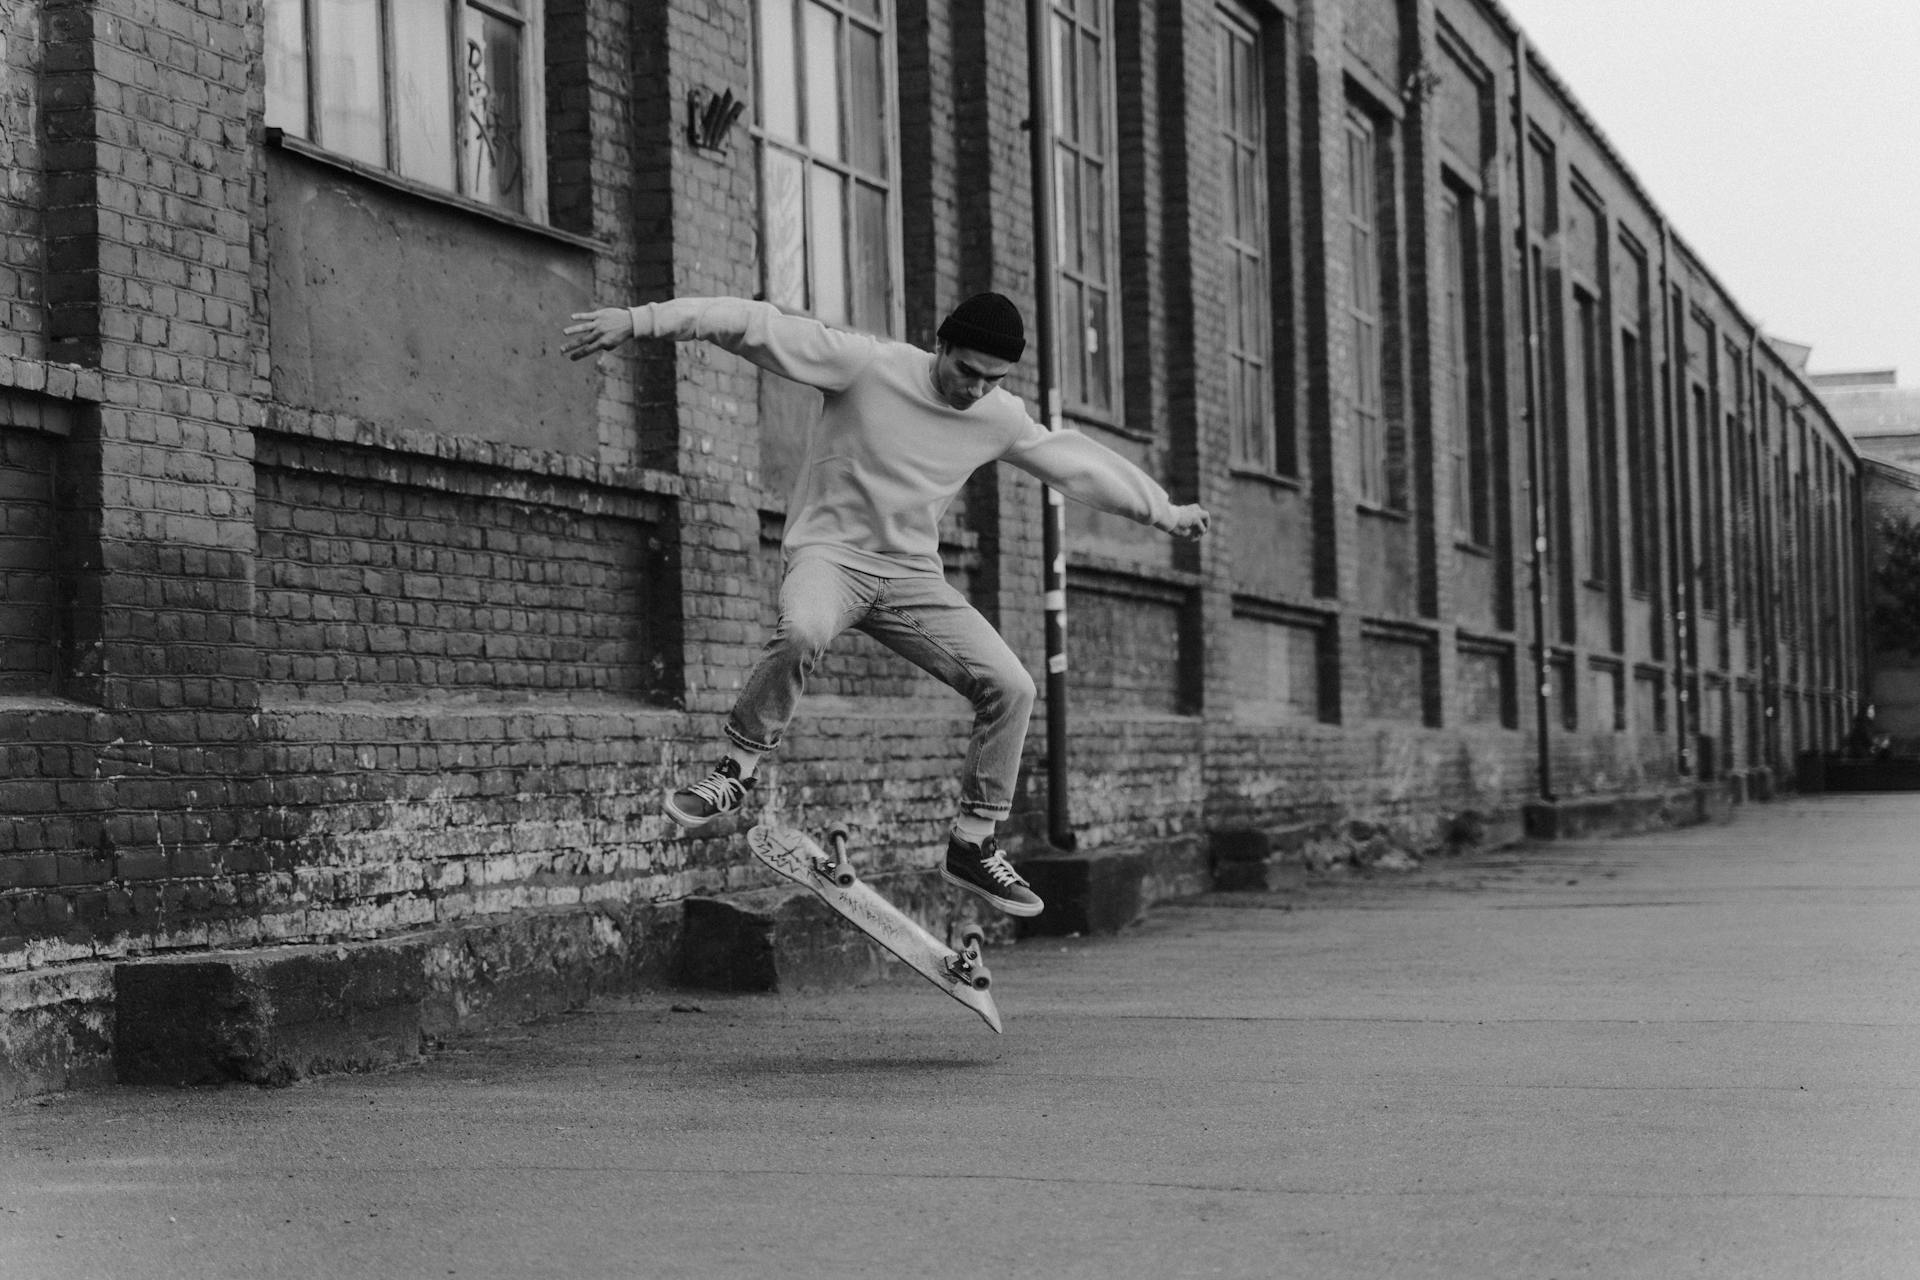
7. Choose the Right Shutter Speed for a Sharp Photo
Photographers worry about many things when capturing sharp photos, and for good reason. One of the most important factors that affect image sharpness is the shutter speed. The shutter speed is the amount of time that your camera takes to capture an image. A long shutter speed notice means that your camera sensor has been exposed to light for a long time, while a short shutter speed makes photo-taking ultra-fast.
When you're shooting a flying bird or any other fast-moving object, you don't want to drop your shutter speed too low or you'll end up with a blurry image. On the other hand, if your subject isn't moving much, like an ambling tortoise, you'll probably want to use a slow shutter speed to make sense of the movement.
If you're shooting in manual mode or shutter priority mode on your camera's main dial, adjust your shutter speed accordingly depending on what you're shooting. A fast shutter speed is required for capturing sports events or action shots where every tiny amount resulting in motion blur will ruin the photo, while a slow shutter speed can be used for artistic purposes like creating motion blur effects in waterfalls and rivers.
Worth a look: Shutter Speed Sports
8. Include a Powerful Main Subject to Stun the Viewer
One of the most essential tips in photography is to have a powerful main subject that will stun the viewer. Composition starts with identifying your subject and deciding how you want it to be presented in your photo. This will make your image more impactful and interesting to look at, as viewers are drawn towards the main subject.
If you're struggling to find an impressive main subject, try looking for something that stands out from its surroundings or has unique features. Remember that what's important is to make sure that your main subject stands out in the entire photo. By highlighting your main subject, you can create a focal point that draws attention and adds depth to your image. So don't be afraid to experiment with different angles and compositions until you find the perfect shot!
Additional reading: Optimize Faces Radiant Photo
9. Simplify Your Compositions for the Most Striking Photos
The most striking photos are often the simplest ones. To create a strong composition, pay attention to your main subject and remove any additional elements that may be distracting. Photos tend to look cluttered when there are too many things going on in the frame. Instead, focus on capturing your main subject with a nice background that complements it. In fact, simplicity is key when it comes to creating a visually appealing photograph. By simplifying your compositions, you can create photos that are both striking and memorable.
10. Use the Rule of Thirds for Satisfying Images
The Rule of Thirds states that a pleasing composition puts the main subject on one of the power points where the thirds line meets. This is an important element to keep in mind when taking photographs, as it can make all the difference between a mediocre shot and a satisfying one.
If you don't use the Rule of Thirds, you'll end up with your main subject placed smack dab in the middle of the frame, which can make for a boring composition. By placing your main subject off-center on one of the power points, you add interest and create a visually pleasing image. Additionally, keeping in mind the horizon line and making sure it falls on one of the thirds lines will give your photo balance and depth. So remember, by following this simple rule, you'll ultimately end up with a satisfying shot every time.
11. Experiment With Different Angles for Unique Looks
One of my favorite ways to create unique photos is by experimenting with creative angles. Instead of always shooting your subject straight on, try placing your camera at different heights and angles to get a more balanced photo. For example, instead of standing directly in front of your subject, try crouching down and shooting from a lower angle for a more dramatic effect. Or, try tilting your camera slightly to add some visual interest to the shot. By changing up the angles you're guaranteed to get some unique-looking shots.
Another tip is to pay attention to the ground underneath your subject when choosing an angle. Sometimes shooting from a higher angle can help emphasize patterns or textures on the ground that would otherwise go unnoticed. Other times, getting down low and shooting upwards can create a more dynamic composition that draws the viewer's eye towards the subject. No matter what angle you choose, be sure to aim your subject towards the light source for optimal lighting conditions before finally shooting away!
For another approach, see: Iphone Camera
12. Use a Wide Aperture for the Best Backgrounds
One of the most important parts of photography is understanding camera settings, and aperture is a key element. Aperture refers to the size of the opening in your lens and is measured in what are called f-stops. In general, wide apertures create beautifully blurred backdrops that make your subject stand out. This effect is achieved because when you use a wide aperture, the depth of field becomes shallow, which means anything not in focus will be blurred.
Related post: Wide vs Narrow Aperture: 10 Examples to Show You the Difference
On the other hand, if you use a narrow aperture, more elements in your photo will be in focus. This can be great for landscape photography or when you want to capture more details. However, if you want a portrait with a beautifully blurred backdrop, using a narrow aperture won't work. If you're just starting with photography and want to take stunning portraits, try experimenting with general wide apertures like f/1.8 or f/2.8 - but keep in mind that if your depth of field is fairly deep, you'll end up with more elements in focus and less blur.
On a similar theme: How to Use Lightroom
13. Increase the Subject to Background Distance to Enhance the Blur
As we discussed in the previous tip, using a wide aperture can enhance the background blur quality of your photos. Another neat trick is to increase the subject to background distance. This simply involves moving your subject away from the background, whether it's an inanimate object or a person.
By doing this, you'll include more of the beautiful area around your subject and create a more interesting composition. Plus, the larger distance between your subject and its surroundings will naturally blur out the background, making your subject pop even more! Just remember not to include anything distracting in the background that could take away from your photo's overall impact. Shoot outward and enjoy experimenting with this technique!
Frequently Asked Questions
How do I get Started with photography?
To start with photography, you need a camera and some basic knowledge of the exposure triangle (aperture, shutter speed, ISO). Start experimenting with different settings and practice taking photos of different subjects to improve your skills. Consider taking a photography course or joining a photography community for further guidance and inspiration.
What are some photography hacks for beginners?
Beginner photographers can improve their skills by experimenting with lighting, using the rule of thirds for composition, and trying different camera angles to capture unique perspectives.
How should a complete beginner start photography?
A complete beginner should start photography by learning the basics of composition, exposure, and lighting. It is recommended to start with a simple camera and practice taking different types of photos to improve their skills. Joining online photography communities or taking a class can also be helpful in gaining knowledge and inspiration.
How to take better pictures for beginner photographers?
To take better pictures as a beginner photographer, focus on composition, lighting, and subject. Experiment with different angles and settings on your camera, and don't be afraid to try new things. Practice regularly and learn from your mistakes to improve your skills over time.
What are the best photography tips for beginners?
Shoot in natural light, experiment with composition, and practice regularly to improve your photography skills as a beginner.
Featured Images: pexels.com