Long exposure photography is a technique that can transform an ordinary scene into a visually stunning image. By leaving the shutter open for an extended period, you can capture movements and light trails in a way that the naked eye cannot see. Whether you're aiming to depict the Earth's rotation or turn familiar sights into something abstract, long exposure photography offers endless creative opportunities.
In this article, I'll showcase how to master long exposure photography like a pro. From technical details to shooting conditions, I'll explain everything you need to know to achieve amazing imagery. I'll also share some extra tips and creative long exposure ideas, such as capturing star trails, motion blur in bright sunlight, and more. With these tips, you can take your long exposure photography skills to the next level and create mind-bending final images.
Consider reading: Double Exposure Photography
What is long exposure photography?

Simply put, long exposure photography consists of keeping the camera shutter open for a determined length of time. This technique-based type of photography allows you to capture motion, such as clouds, water, cars or animals in a unique way that cannot be seen with the naked eye. When you're shooting handheld, it can be challenging to produce sharp images using a slow shutter speed starting at around 1/60th of a second.
To get the best results and ensure your final image is well-exposed, it's important to use a steady tripod. You'll also want to consider using a neutral density filter if you're shooting daylight long exposure images as this will help reduce the amount of light hitting your sensor and prevent overexposure. By using a longer time setting on your camera shutter open, you'll capture details that are often missed by the naked eye.
The final result of long exposure photos can be breathtakingly beautiful. For instance, northern lights can appear much more vivid in long-exposure photographs than they do to our naked eyes. If they're unfamiliar with this type of photography, some may not understand how stunning daytime long exposure images can appear. However, by using this technique to capture light hitting objects in motion — like waves crashing against rocks — you'll create something truly unique and mesmerizing.
Consider reading: Ring Light
Craft Your Shot: Perfecting Image Composition and Focus Lock
When it comes to long exposure photography, one of the most critical aspects is perfecting image composition and focus lock. Generally, you'll want to ensure that your entire shot is sharp and in focus. Achieving this requires an understanding of hyperfocal distance - the area of acceptable focus in front of and behind your main subject. By using a depth of field calculator or manually adjusting your lens's focus ring, you can achieve optimal sharpness throughout your image.
If you're struggling with achieving proper focus, consider switching from autofocus to manual focus. This allows you to have complete control over where the camera focuses within the scene. You can also choose which active autofocus point to use if you prefer using autofocus. To ensure that your focus remains locked on your main subject, half-press the shutter button to activate autofocus and then release it while maintaining half-pressing position.
Finally, be mindful of accidentally pressing the shutter button while shooting long exposures. Doing so can result in blurry or unusable images. Instead, use a remote shutter release or self-timer function to trigger the camera without physically touching it. By following these tips for perfecting image composition and focus lock, you'll be well on your way to capturing stunning long exposure photographs!
Consider reading: Shutter Speed Sports
How to take long exposure shots
Long exposure photography has been a well-loved technique in capturing unbelievable long exposure photos. However, it requires some technical aspects and camera settings that need to be considered before diving into the process.
Let's dive into the long exposure camera settings. Firstly, you need a tripod or any stable surface to keep your camera still during the shoot. Secondly, set your camera to manual mode and adjust the aperture and ISO according to the lighting situation. Lastly, set your shutter speed to a slower setting between 1-30 seconds depending on how long you want to expose your shot.
Experimenting with long exposure photography can be both exciting and frustrating especially when dealing with different lighting conditions. But with patience and practice, you'll get the hang of it! Try taking shots of busy streets at night or mesmerizing waterfalls during daytime - you'll surely be amazed by what you can create through this technique.
A unique perspective: Wedding Photography Lighting Techniques
1. Step-By-Step Guide to Long exposure photography
Long exposure photography sounds pretty obvious: it is the technique of using a long shutter speed to capture an image. But what is the single rule for achieving neat photos? First and foremost, find a safe place to set up your camera on a sturdy tripod (remember, it's worth risking your gear to get that perfect shot). Once you've analyzed the surrounding elements, use photography composition techniques to frame your subject. Then, adjust your camera settings by turning it to bulb mode and using image stabilization to focus. Don't forget to meter adjust your shutter speed and aperture with the light meter.
Before taking your shot, always do a test photo double-check to make sure that everything is in focus and properly exposed. If you plan on using filters, calculate the shutter speed depending on which lens filters you have in place. Be careful not to touch the focus ring once you have it set, as this can cause light leaking. Use a light leaking cover or filter holder if necessary.
When it comes time to take the photo, use a shutter release or shutter delay to avoid any unwanted vibrations from pressing down on the camera. And finally, don't forget about the exposure time – helpful apps are available for calculating this based on your camera settings and lighting conditions.
All-in-all, long exposure photography is a fun and rewarding technique that lets you capture stunning images of things like flowing water or people walking by in slow motion. Just remember to follow these steps and take your time setting up for each shot – patience pays off!
A fresh viewpoint: How to Use Lightroom
2. Long exposure photography settings and techniques
Long exposure photography can produce stunning images, but it requires the right settings and techniques to get the desired effect. The first step is to choose the right conditions you're shooting in, such as low light or moving water. For suggested settings, start with manual mode and set your shutter speed to bulb mode or a few seconds for basic long exposure photos. If your camera has a pro mode, this will give you more control over fundamental settings like ISO and aperture.
When it comes to metering mode, matrix mode (also called evaluative mode) is a common choice for long exposure photography. However, image stabilization can add blur if not turned off. One of the most common mistakes is not getting sharp images, as cameras struggle with focus in low light. A lens filter can help with this, and taking a test shot beforehand can make it easier to check your focus section using live view mode. Focusing techniques like hyperfocal distance are also easy ways to ensure you've focused correctly before switching to manual focus for the final shot.
Curious to learn more? Check out: Low Light
3. Long exposure and shutter speed
Long exposure photography relies heavily on understanding shutter speed. Shutter speed refers to the length of time that the camera's sensor is exposed to light. The longer the exposure time, the more light that enters the camera and the more drastic impact it has on your final photos. When it comes to long exposure photography, shutter speed plays a crucial role in capturing the right amount of light for your desired effect. Understanding your intention behind creating long exposure photos and how different shutter speeds can affect your final effects is essential.
With longer shutter speeds, such as ultra-long exposures of 5 minutes or more in bulb mode, cameras don't just capture an image; they create minimalist images with dreamy atmospheres. You're softening moving elements and creating a dynamic impression with each photo you take. Shorter long exposures still maintain some detail while capturing moving elements with shorter exposure times like 1 minute can capture details of moving elements while maintaining a dynamic impression within mere approximations.
If you're looking for a quick reference guide to help you master shutter speed and long exposure photography, we've created the ultimate cheat sheet for you! This in-depth information on shutter speed photography guide provides everything you need to know about adjusting settings based on varying exposure times. Whether you're looking to create ethereal abstracts or capture minimalist images, mastering shutter speed is key to achieving your desired results in long exposure photography.
Expand your knowledge: Fisheye Lens Camera Tips
4. Long exposure and aperture
Long exposure photography is a technique that involves using a longer shutter speed to capture an image. When you're shooting in low light conditions or want to create motion blur effects, long exposure photography can be extremely useful. One important factor to consider when taking long exposure photographs is the aperture setting.
The sweet spot refers to the aperture setting that will give you the sharpest image possible. This varies depending on your lens and other factors, but as a basic rule, you should aim for a smaller aperture for long exposure photography. However, if you're shooting in daylight and need a well-exposed photo, you may need to use wider apertures and adjust your ISO or exposure stops accordingly. It's important to note that using too small of an aperture can result in optical diffraction which can negatively impact image quality. Therefore, finding the sweet spot for your specific lens is crucial for achieving the highest quality wait possible in long exposure photography, especially at night choosing wide-angle lenses.
Intriguing read: Dark Long Exposures Made Simple
5. Long exposure and ISO
Long exposure photography lets you capture stunning images that you're unable to see with the naked eye. However, when taking long exposures, ISO plays a crucial role in getting noise-free photos. The base ISO is usually set to 100, which is the lowest native ISO on your camera. Shooting at this ISO will reduce digital noise and give you a clean image, especially in daylight.
However, when doing nighttime long exposure photography, you'll need to play with increasing ISO settings. Higher ISOs can introduce hot pixels and color noise into your final image. To avoid noise, I highly recommend taking long exposures at the base ISO or using noise reduction software afterward. Understanding ISO and how it affects your images is key to getting detailed information in your night long exposure photographs. As Uros Fink puts it: "taking long exposures at high ISO stops won't drastically affect the outcome of your image."
You might like: Lightroom Noise Reduction
6. Long exposure Calculator in a long exposure app
If you're into long exposure photography, you know that getting the right shutter speed can make all the difference. And that's where a long exposure calculator app comes in handy. With this tool, you can easily calculate the correct shutter speed for your long exposure shot based on your chosen aperture and ISO settings. This is especially useful when using neutral density filters, which reduce the amount of light entering the lens and require longer exposures.
The exposure calculator lets you test settings before a shoot, so you can ensure that your long exposure photos come out perfectly exposed every time. It takes into account the three main types of light metering - spot, center-weighted, and matrix - to provide accurate readings for any situation. Using a long exposure app with a built-in calculator can really help take your photography to the next level by simplifying the process of shooting long exposures and allowing you to focus on capturing stunning images that showcase how this type of photography works within the exposure triangle.
Related reading: Create Fantastic Light Orb Images
Step 3: Set up the right gear (including a tripod)
Long exposure photography isn't as gear intensive as some other photographic specialties, but you'll still need the right equipment to get great shots. First and foremost, you'll want a camera with manual controls and the ability to shoot for extended periods of time without overheating. A mirrorless body is a great choice for this type of photography due to their light weight and their cameras in-body image stabilization system.
A tripod is essential for long exposure photography because you need to keep your camera steady during shooting. Without a quality tripod, even a five-second or ten-second exposure can result in a blurry shot. With longer exposures, like a ten-minute exposure, you're bound to get an unusable photo if your camera moves at all during shooting. Invest in a tripod that can withstand significant wind, and it'll pay off in the long exposure shooting process.
Other relevant accessories include a filter holder and drop-in filters. Depending on the look you're going for with your long exposures, certain filters will be more useful than others. A remote shutter release or remote shooting app can also come in handy to avoid touching the camera during shooting which may cause motion blur. Alternatively, use your camera's self-timer function if you don't have access to these accessories. Once everything is set up correctly, all that's left is to compose your shot, attach any necessary filters or filter holders to your lens, wait for the right lighting conditions and hit that shutter button!
Additional reading: Iphone Camera
Unveiling the Magic of Daytime Long Exposure Photography
Long exposure photography has become increasingly popular over the years, making it a must-have accessory for any photographer. However, this type of photography can be challenging due to the high amount of light that enters the camera sensor, resulting in overexposed images. This is where neutral density filters come in handy, as they block out some of the light and allow for longer exposure times without overexposing the image.
On a sunny day, long exposure photography can create interesting perspectives by capturing motion blur of moving objects like waterfalls or clouds. With increased rapidly shutter speeds, these movements become frozen and lose their dynamic quality. By using long exposure techniques with neutral density filters, photographers can capture stunning visuals that are not visible to the naked eye. So next time you're out shooting on a bright day, consider experimenting with long exposures and explore the magic that comes with it!
1. Long Exposure water shots and silky effect
Long exposure photography is a technique that can have a noticeable impact on landscape photography. One way to add water to your shots and achieve the silky effect is by using longer shutter speeds. By using a longer shutter speed, you can capture the movement of the water making it look soft and smooth. This approach to long exposure photography can create minimalist images that are both calming and captivating.
When shooting with longer exposures, it's important to consider the shutter speed you're using. Shorter long exposures may not be enough to achieve the desired effect, while longer long exposures may result in overexposed shots. A good rule of thumb for coastal photography guide is to start with shutter speeds between 1/4 and 1 second and adjust from there based on the scene and lighting conditions. With this long exposure technique, even a small river or stream can be transformed into an ethereal landscape that draws in the viewer's attention.
You might like: Capture Perfect Panning Shots
Frequently Asked Questions
What are some examples of long exposure photography?
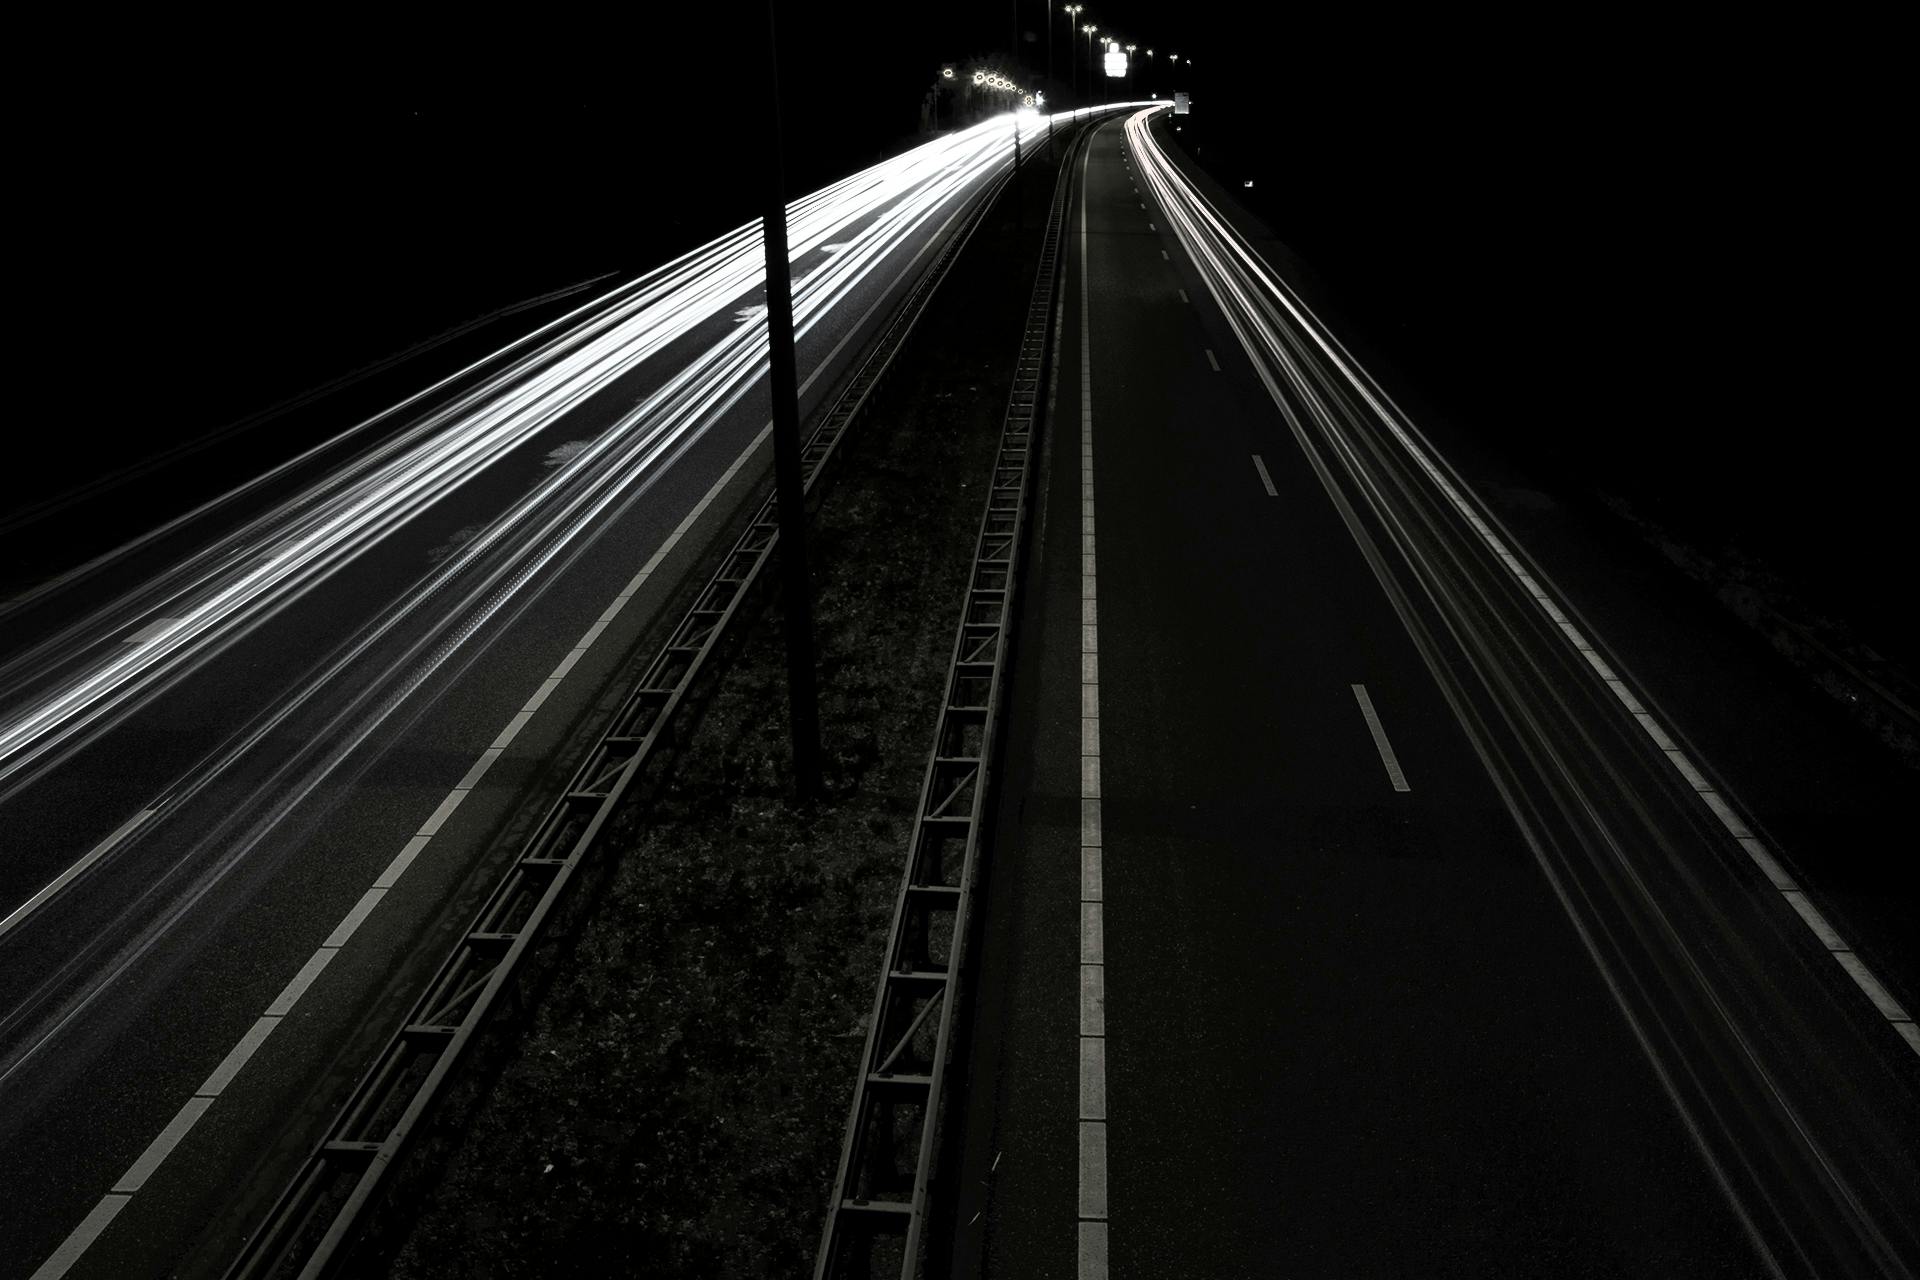
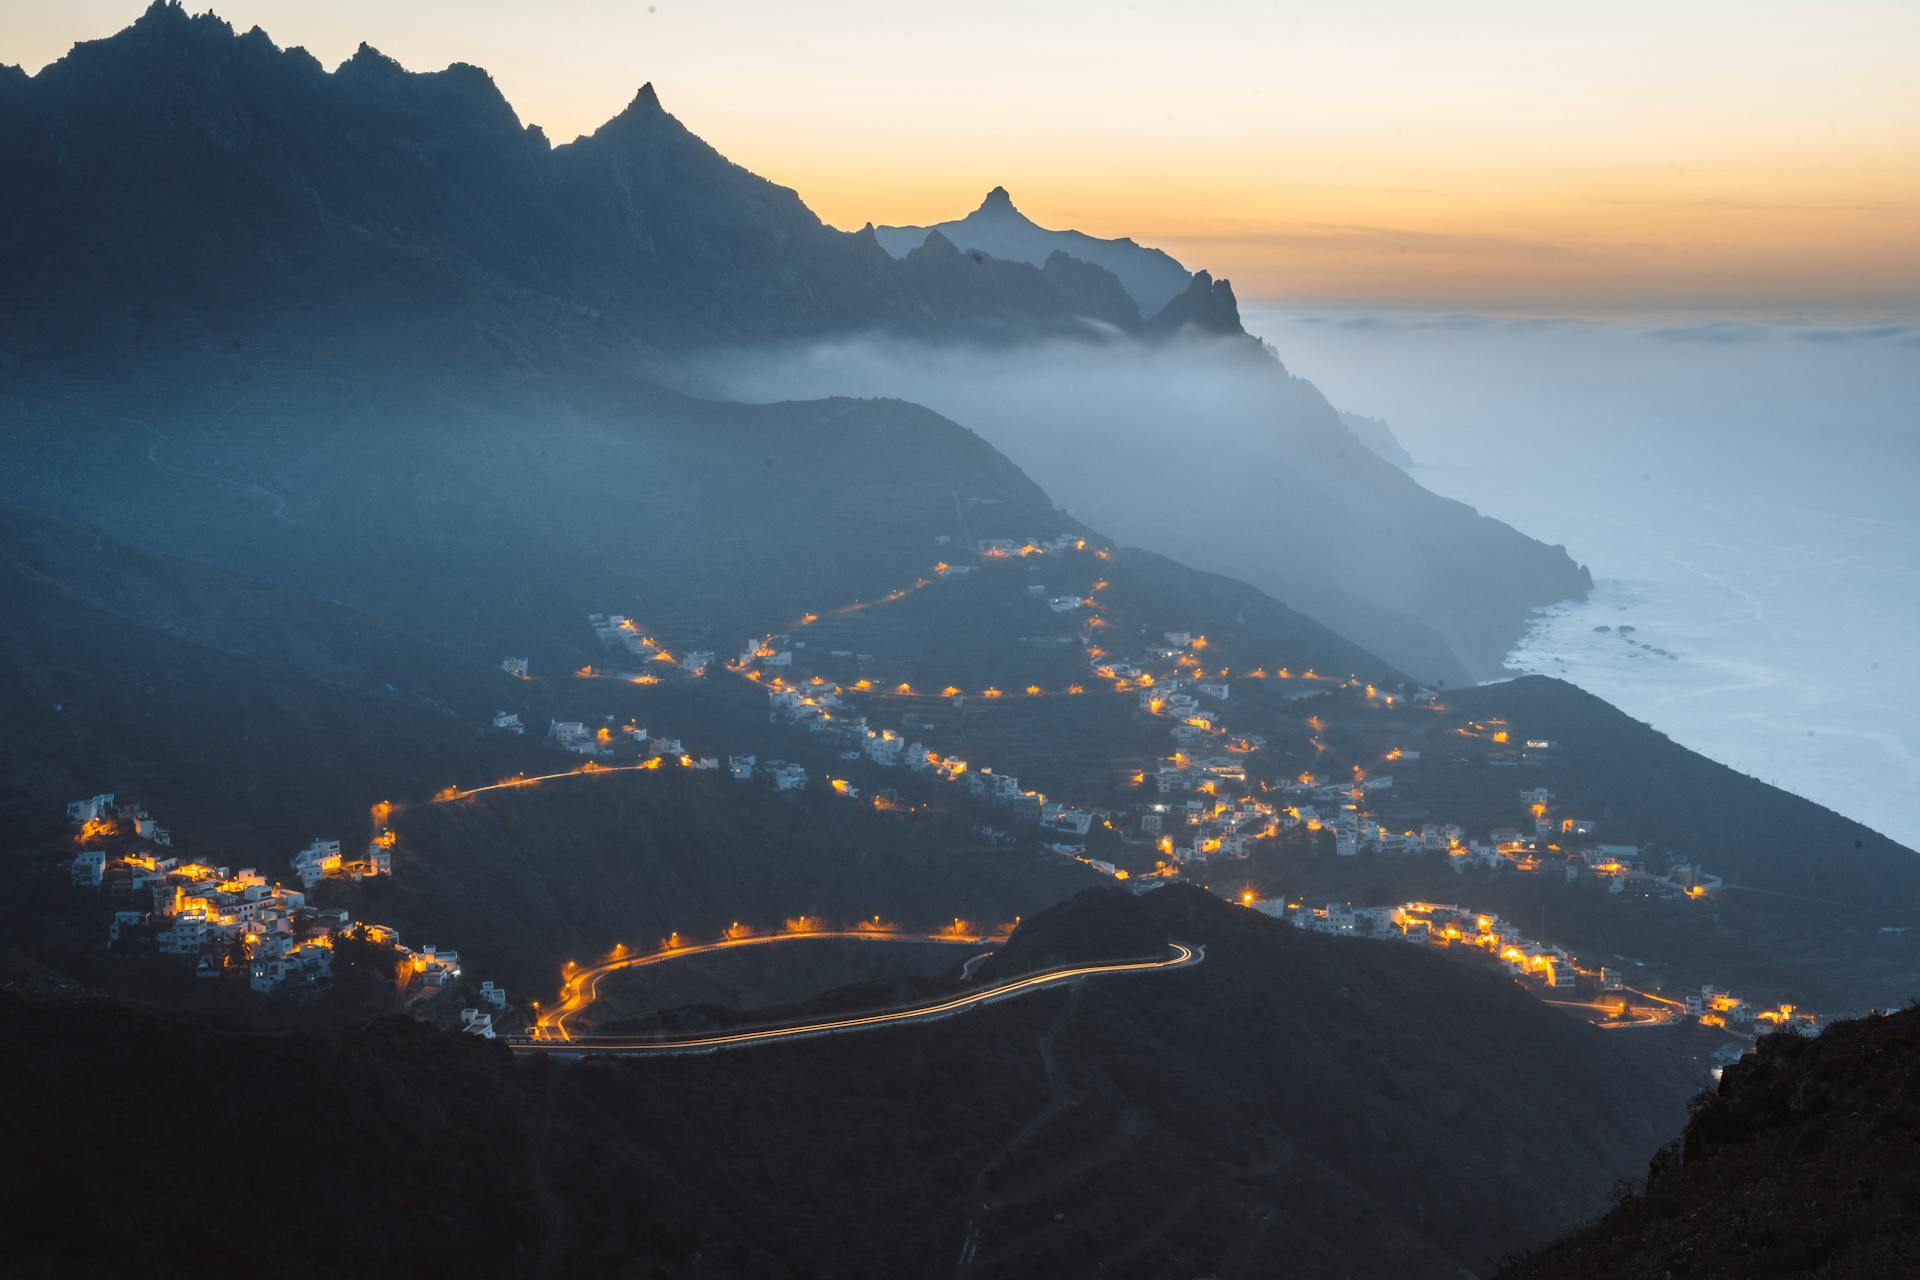
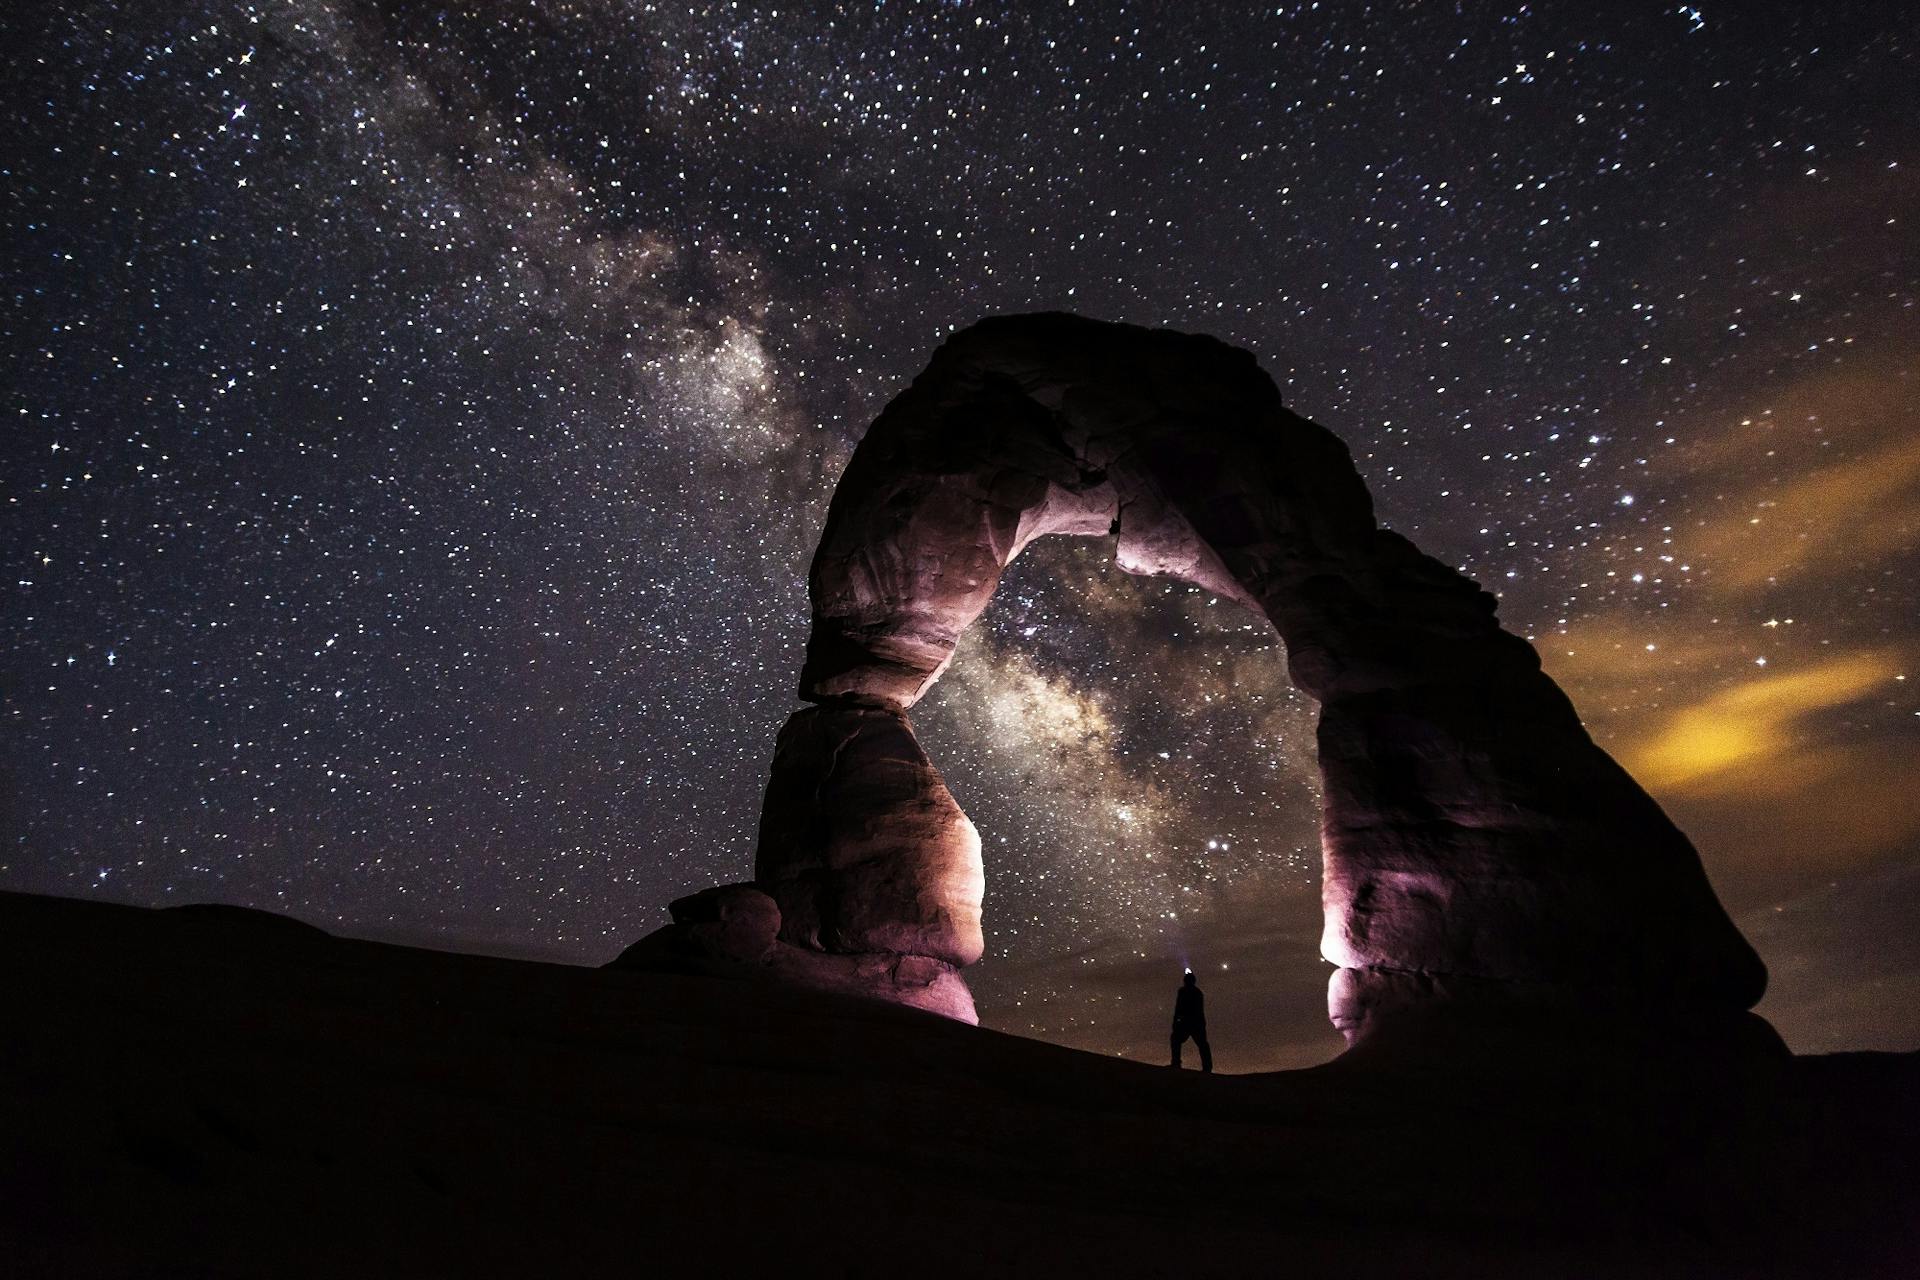
Long exposure photography involves keeping the shutter open for an extended period, allowing light to be captured over time. Some examples include images of star trails, flowing waterfalls or streams, and light trails from cars or fireworks.
How do you calculate long exposure?
To calculate long exposure, you need to know the length of time your camera's shutter will stay open. This can be adjusted in manual mode or by using a setting called "bulb mode" that allows you to keep the shutter open for as long as you want.
What are the best camera settings for long exposure photography?
The best camera settings for long exposure photography depend on the lighting conditions and desired effect, but generally involve using a low ISO, small aperture, and slow shutter speed. Experimentation is key to finding the perfect balance of settings for your unique shot.
What is the best setting for night long exposure photography?
The best setting for night long exposure photography depends on factors such as the amount of available light and desired effect. Generally, a low ISO, small aperture, and longer shutter speed are recommended for capturing sharp, detailed images in low light conditions.
Can you take long exposure photos without a tripod?
Yes, it is possible to take long exposure photos without a tripod, but it requires a steady hand and proper stabilization techniques such as bracing against a solid surface or using a camera strap as a makeshift stabilizer. However, for best results and to avoid blurry images, it is recommended to use a tripod.
Featured Images: pexels.com