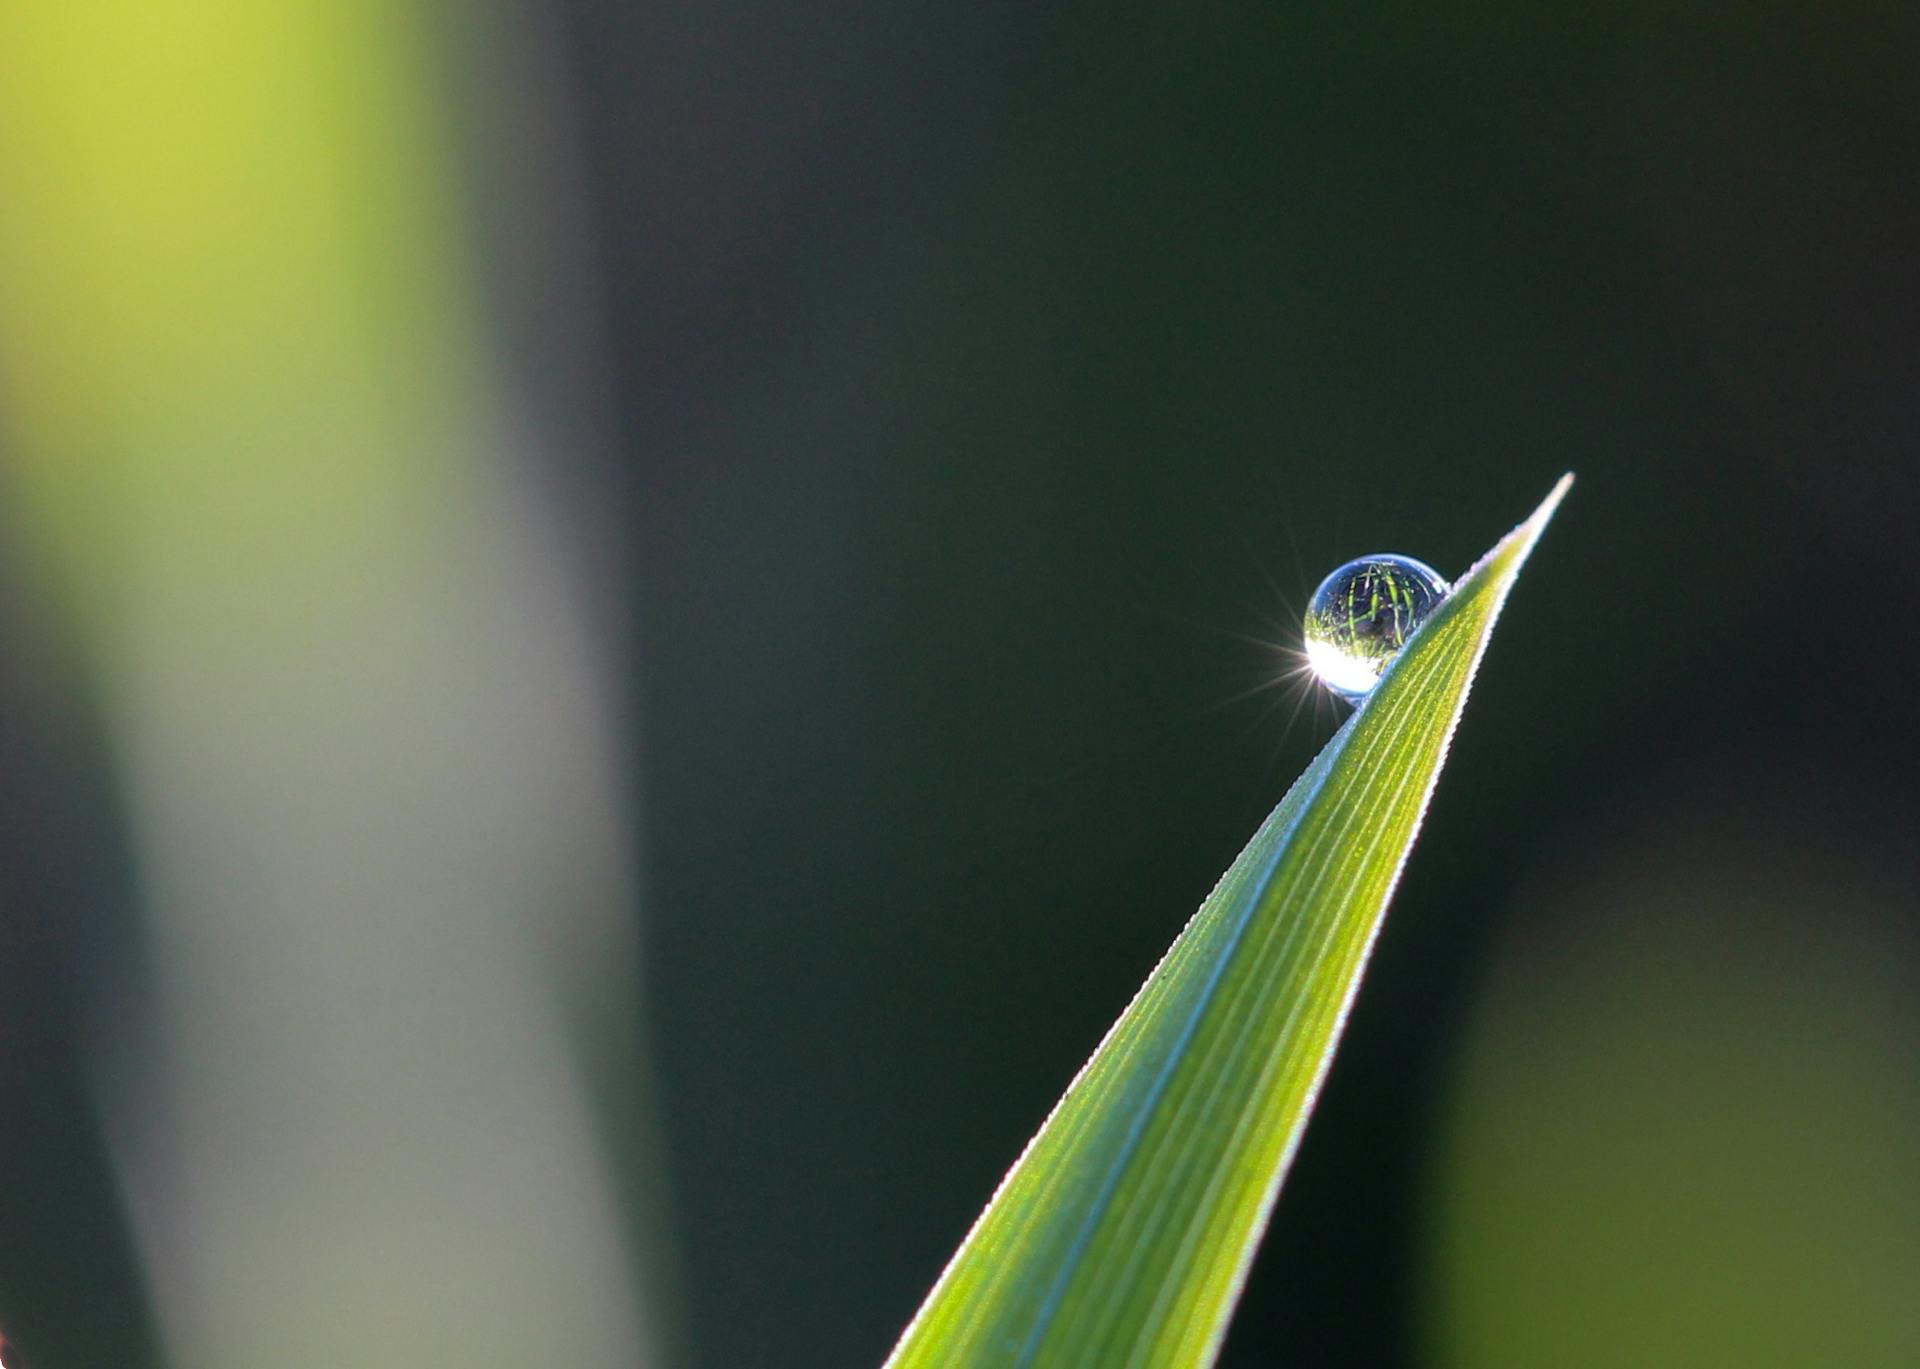
Water drop photography is a fun project that can produce stunning results with just a basic setup. If you've ever seen mesmerising photos of water drops, you may have wondered how to capture them yourself. Well, wonder no more! In this article, I'll give you some tips and tricks to learn water drop photography and achieve amazing results.
My name is Ana Mireles, and I'm excited to share my knowledge with you. Capturing water drops can seem challenging at first, but with the right setup and technique, anyone can do it. In addition to the basic setup, I'll also guide you through the editing process to help bring out the best in your images. Whether you're a beginner or an experienced photographer looking for creative photoshoot ideas, this article will provide plenty of inspiration. So, if you're as excited as I am, let's jump into the world of capturing water drops!
Discover the Art of Capturing Water Drops with Photography
Water drop photography, aka water droplet photography, is a form of high-speed photography that captures the moment when a water droplet bounces off a solid object or the water's surface. It's no longer called just "water drop photography" as it has evolved to include related genres such as milk bath photography, splash photography, and drinks photography. There is also a related genre called water drop refraction photography which uses a prism to photograph water drops suspended in mid-air.
To create stunning photographs in this genre, you'll need a few tools: a camera with fast shutter speed, a macro lens for close-up shots, and a water container to drop ice cubes into. The key is to freeze motion by capturing the exact moment when the drop touches the surface. To achieve this, use a fast shutter speed and experiment with different lighting conditions until you find an interesting background that complements your subject.
When photographing water drops falling into water, aim for good reflection on the surface of the liquid for an added effect. You can also try dropping food coloring or adding objects like smiley faces or flowers to your shot for more creativity. With patience and practice, credit Erda Estremera for her mastery in this art form - you too can create stunning images in water drop photography!
Worth a look: Lightroom Tutorial 20 Create
Essential Items for Captivating Water Drop Photography
Water drop photography can be a fun and creative process, but it requires some essential factors to achieve captivating results. The first item on your list should be an external flash or two. These flashes are crucial in getting the perfect lighting and preventing motion blur in your images. Using telephoto lenses optionally will give you the ability to shoot from a distance, which is great if you want to avoid any reflections on the water droplets.
Another important item is a macro lens, which allows you to capture the intricate details of each individual water drop. A large mixing bowl is also required because it provides enough surface area for larger drops to form. Adding food dye with a medicine dropper will create vibrant colors that make your images pop. Keep in mind that you don't need expensive equipment to get started; creativity will always trump gear!
In conclusion, capturing stunning water drop photography requires some essential items such as external flashes, telephoto lenses optionally, macro lenses, large mixing bowls, food dye and medicine droppers. However, the most important aspect of this type of photography is the creative process itself! Experiment with different angles and lighting setups until you find what works best for you. With practice and patience, anyone can achieve breathtaking water drop photos without breaking the bank on expensive equipment!
If this caught your attention, see: Create Fantastic Light Orb Images
What Do You Need to Create a Water Drop Photograph?
Water droplet photography can be a fascinating and impressive art form. To create stunning water drop photographs, you don't necessarily need sophisticated equipment. Instead, a camera with manual controls is an essential piece of equipment you'll need. This will allow you to adjust the aperture, shutter speed, and ISO settings to capture high-quality water drop photos.
Besides a camera with manual controls, you'll also need some additional equipment for water drop photography. A tripod is vital to keep your camera stable while taking pictures. It's also helpful having a remote shutter release or self-timer function built into your camera to eliminate any movement caused by pressing the shutter button manually. Additionally, it would help if you had a light source such as a flashlight or lamp to enhance the water drops' details and create reflections.
Finally, capturing beautiful water drop images requires patience and precision. You can experiment with different objects, backgrounds, and lighting setups to create unique effects in your photographs. As long as you have the right equipment and techniques plus lots of creativity, you can produce beautiful water drop photographs that will amaze everyone who sees them!
Here's an interesting read: Fisheye Lens Camera Tips
1. The Equipment
When it comes to water drop photography, having the right equipment is crucial to capturing incredible water drop photos. The short answer is that you'll need a camera with interchangeable lenses, preferably a macro lens, and a fast shutter speed to freeze the motion of the water drops. But beyond that, there are many options for cheap equipment that can make this one of the most fun photography projects you'll ever try.
One popular video by Robert Anderson provides a great explanation of how he captures stunning water drop photos using an external flash and a medicine dropper. However, if you're looking for more professional water dropper kit options, there are plenty available such as Splash Art 2 or MIOPS Splash. Regardless of what equipment you use, the challenging part of water droplet photography is getting your timing right. A remote shutter release can be helpful so that your camera fires when you want it to and camera shake doesn't matter as much since you won't have to physically touch your camera during the shot. Also important is adjusting your settings depending on the water drop size and lighting conditions.
Expand your knowledge: Iphone Camera
2. The Setup
To achieve consistent results in water drop photography, you need to create the right setup. Working indoors in a dark environment is ideal for this type of photography. First, set up your light sources - you'll need at least two light sources for the best results. Place white cardboard behind your water dropper and container fill with the liquid that you're going to use. Once you've built the basic setup, add flash pointed at the water droplet from both sides.
To add color to your water drop photography, you can either add colored gels or food dye to the liquid you're using. If you want a colored background, put colored gels over your lights, or if you prefer a white background, remove the gels and place them on top of your camera's lens instead. I recommend establishing a color palette before adding colors to your shots – Adobe Color has many palettes to choose from that will work well with different lights and liquids. With these tips in mind, you'll be able to experiment with random colors and discover new ways of capturing beautiful images in water drop photography!
(credit Omar William David Williams)
Broaden your view: Low Light
3. What are the Best Camera Settings for Water Drop Photography?
Water drop photography can be a challenging but rewarding genre to explore. To capture stunning water drop images, it's crucial to use the correct camera settings. Start by putting your camera in manual mode so you can have complete control over the settings. One of the most important settings is the correct exposure, which can be achieved by using the fastest shutter speed possible. A fast shutter speed avoids capturing any motion blur while a wide depth of field helps achieve sharp focus throughout the image.
When it comes to lenses, macro lenses generally create narrow depth of field, making them ideal for water drop photography. Ensure that you're using a lens that delivers consistent results and has a sweet spot where images are at their sharpest. If you're working with auto-focus, remember to switch to manual focus once you've set up your shot. This ensures that your focus remains constant even as drops fall through the frame.
Finally, set up rear curtain sync on your camera to freeze motion and capture consistent results. Keep in mind that high ISO introduces noise into your images, so try not to exceed 400 unless your camera handles high ISO well. By following these tips and experimenting with different techniques, you'll be able to take beautiful water drop photography shots like those credited to Skyler Ewing!
Curious to learn more? Check out: Capture Perfect Panning Shots
4. Step 1: Prepare the liquid
Step 1 in water drop photography is preparing the liquid. You can use plain water or mix regular food dye alternatively to create a colorful background. To make the drops more stable and rounded, add glycerin, guar or xanthan gum to the water. This will help you create more interesting shapes and stunning effects for your photographs. The key is to experiment with different liquids until you find the perfect combination that suits your taste and style. So, take some time to play around with various liquids and additives until you achieve your desired results!
Frequently Asked Questions
What gear do you need for water drop photography?
To capture stunning water drop photos, you'll need a high-speed camera with manual controls, a tripod, a flash or continuous light source, and a dropper to control the drops. Additional equipment like a macro lens or shutter release cable can also enhance your results.
How to do water drop refraction photography?
Water drop refraction photography involves taking a photo through a water droplet. To do this, you need to create a setup with a water drop hanging off a surface and position your camera directly in front of it. Adjust the focus and lighting to capture the refracted image inside the droplet.
How to get started with water drop photography?
To get started with water drop photography, you will need a camera and a way to create drops of water. Use a pipette or eyedropper to drop water onto a surface, adjust your camera settings for a fast shutter speed, and experiment with different lighting setups to capture stunning images.
What is the best light for water drop photography?
The best light for water drop photography is a soft, diffused light source like a cloudy day or a softbox. This will prevent harsh reflections and make the water droplets appear more transparent and detailed in your photos.
What is water drop refraction photography?
Water drop refraction photography is a technique where water droplets act as lenses to create unique and distorted images of the subject behind them. It's a fascinating way to capture the world through a different lens, quite literally!
Featured Images: pexels.com